Let’s cut to the chase here—if your car’s paint is flaking, faded, or that old crappy clear coat is turning yellow before your next paint job, skipping proper prep is basically painting a house on a rotting foundation. As a supplier that hooks up automotive paint shops with the good stuff (no sketchy hardware store swipes here), I’ve seen way too many shops rush this step and end up fixing botched paint jobs 6 months later. Prep isn’t half the battle—it’s 90% of the job, and removing old paint right is non-negotiable. Let’s break this down like we’re geeking out in a shop bay, no fancy textbook jargon. Automotive Paint Shop
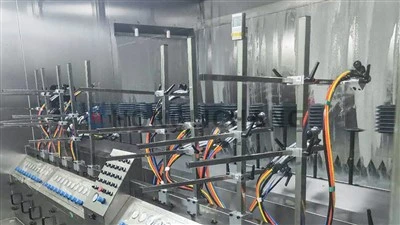
First, let’s get the basics straight: you can’t just yank off paint with a random scraper and call it good. Old paint comes in layers—base coat, clear coat, maybe even multiple layers of primer from previous jobs. Removing the wrong layer or skipping a critical step can leave you with bubbling, peeling paint before you even roll out your fresh coats. And for the record, this isn’t just for full resprays—if you’re spot-repairing a rusted fender, still need to strip that old paint all the way to bare metal (or at least to solid, rust-free primer).
Let’s start with the most important first step: safety. I don’t care how much of a rush you’re in, you can’t skip this. Stripping paint makes toxic dust, fumes, and harsh chemicals—none of that belongs in your lungs. If you’re sanding or media blasting, wear a N95 (at minimum, but a full-face respirator is way better) and nitrile gloves (latex won’t hold up to solvents). If you’re using chemical strippers, you need a vapor respirator, goggles, and a full coveralls because that stuff eats through skin and clothes. Also, open every window and door in your bay, use a heavy-duty exhaust fan to suck fumes out—no exceptions. I’ve seen guys cut corners here and end up with respiratory issues that put them out for weeks, and no shop needs that.
Next, picking the right method. This is where a lot of DIYers and even some new shops mess up—one size does not fit all. Let’s go through the most common, reliable methods, and when to use each.
First up: wet sanding. Wait, wet sanding? That’s for finish work, right? No—wait, rough wet sanding (using 80-120 grit paper) is perfect for stripping old, flaky top coats, clear coat, and light base coat without messing with the underlying metal if you don’t need to. The trick here is to keep the surface wet the whole time—either use a spray bottle with water and a drop of dish soap, or dunk your sandpaper in a bucket of soapy water. The water keeps dust down, cools the paper so it doesn’t clog, and actually makes the sanding more effective. You’ll want to use a sanding block, not just your hand—your hand will follow curves, and you’ll end up with uneven, low spots. Wet sanding is great for smaller jobs, like a door or a fender, because it’s cheap and easy to control. The downside? It’s slow as hell for full cars, and you have to make sure you dry the surface completely before moving on—any leftover water can lead to rust later.
Second: chemical paint strippers. This is the go-to for full car stripping, especially if you have multiple layers of old paint or need to get down to bare metal. The good strippers (not the cheap junk from auto parts stores) actually break down the paint’s molecular structure so you can just scrape it off like slime. The key here is picking a stripper that works for the type of paint you’re removing—acrylic, enamel, urethane, different strippers handle different stuff. Also, always test it on a hidden spot first—like the inside of a door jamb—because some strippers can eat through rubber seals or plastic trim if you’re not careful. How to use it? Apply a thick coat (1/8 inch) with a paintbrush, let it sit—follow the manufacturer’s time, don’t leave it on too long or it’ll start eating metal. Once the paint starts bubbling and lifting, scrape it off with a plastic scraper (metal will scratch the metal or primer) and then wipe the whole area down with a neutralizer—because the stripper’s residue can mess with new paint adhesion. Pro tip: if you’re stripping a full car, cover the parts you don’t want stripped (trim, glass, rubber) with painter’s tape and plastic first. This method is way faster than wet sanding for full cars, but it’s messy, smelly, and requires way more cleanup. Also, make sure you dispose of the stripper and paint waste properly—don’t just dump it down a drain, that’s a huge environmental hazard and illegal in most places.
Third: media blasting. This is the heavy hitter for when you need to get all the way to bare metal, fast. Media blasting uses abrasive material (sand, glass beads, walnut shells, even baking soda) to blast off old paint in minutes. The type of media matters a lot, though. Sand blasting is cheap and super aggressive, but it can etch metal too deep if you’re not careful—bad for thin panels like a hood or trunk. Glass bead blasting is more gentle, gives a smooth, uniform surface that’s perfect for new paint adhesion, no deep scratches. Walnut shell blasting is even gentler, great for parts with thin metal or if you’re working around plastic components because it won’t damage them. The downside? Media blasting is loud, makes a ton of dust, and you have to cover every single thing you don’t want blasted (trim, lights, engine parts, even the tires). Also, if you don’t have a blasting hood, you’ll get way too much overspray that gets everywhere in your shop. It’s great for full resprays or frame work, but not ideal for small, delicate parts.
Wait, I should also mention the “sand then prime” step that most people skip when they’re removing old paint. Once you’ve stripped all the old paint down to the base you want (either bare metal or the last good layer of primer), you can’t just stop there. You need to scuff that surface with a fine-grit sandpaper (320-400 grit) to create tiny, tiny scratches—this is called “etching” the surface. The new paint’s primer will “key” into those scratches, so it sticks way better than it would on a smooth, glossy surface. If you skip this, your new paint can peel or bubble within months, even if you did a good job stripping. Also, if you hit bare metal during stripping, you need to apply a rust-inhibiting primer immediately—don’t leave bare metal exposed for even an hour, especially if you’re working in a damp bay. Rust starts faster than you think, and once it gets under your new paint, you can’t fix it without stripping everything again.
Now, let’s talk about mistakes I see all the time, because even experienced shops mess these up. First, using the wrong grit sandpaper. Too coarse (like 40 grit) and you’ll leave deep scratches that show through the new paint, even 2 coats of base. Too fine (like 600 grit) and you won’t etch the surface enough, so paint won’t stick. Stick to 80-120 grit for stripping, 320-400 grit for prepping after stripping. Second, not cleaning the surface after stripping. I can’t stress this enough—after you scrape off old paint, you have to wipe the whole area down with a wax and grease remover, then a clean microfiber cloth, and then wipe it down again with isopropyl alcohol. Any leftover dust, stripper residue, or old paint debris will show up in your new paint as bumps or spots. Third, rushing the stripping process. I’ve had shops send me cars that they tried to strip in an hour, and the old clear coat was still sticky under the new paint. That leads to a whole host of issues, from yellowing clear coat to peeling. Take the time to get every last bit of old paint off—especially in tight spots like door edges, under trim, and around window seals. Those spots are where peeling starts, so you need to get in there with a small scraper or even a toothbrush for crevices.
Also, let’s address the DIYers reading this, because a lot of people try to do this at home. If you’re working on a personal car, skip media blasting unless you have access to a rented booth—too much dust for a garage. Chemical strippers work, but get the good, professional grade stuff (we supply shops with it, but you can find it at most auto parts stores too). Just be extra careful with fumes. And for anyone who says “steel wool works?”—no. Steel wool leaves metal shavings that will rust later, plus it doesn’t etch the surface enough. Save the steel wool for waxing, not stripping.
Wait, another thing: if you’re working on a car with original paint that’s not too bad, do you have to strip all the way to bare metal? No. If the old paint is in good shape, no flaking, no rust, just faded, you can scuff it with 320 grit, wipe it down, and apply a barrier coat before new paint. But if there’s any flaking, bubbling, rust, or the clear coat is peeling, you have to strip that layer completely. Leaving even a small spot of old, bad paint under your new coat is a recipe for disaster.
Now, let’s get into the post-stripping step that makes or breaks the whole job. Once you’ve got your surface stripped and scuffed, wipe it down one more time—seriously, one more wipe. Then, don’t wait more than 24 hours before applying primer. Bare metal starts rusting in as little as 24 hours, even if it looks dry. If you can’t prime right away, cover the surface with a tack cloth and plastic wrap to keep dust and moisture out.
As a supplier that’s been working with automotive paint shops for years, I know how much time and money goes into a paint job. Cutting corners on paint removal isn’t just bad for the final look—it’s bad for your reputation. A shop that does a proper strip job will get repeat customers, because their paint jobs last.

If you’re a shop owner, paint manager, or someone planning a big paint project, and you need the right products to make this process easier (strippers, sandpaper, protective gear, all the good stuff we supply), hit us up to connect and chat through your specific needs. Whether you’re doing a full car respray, a small repair, or working on vintage cars, we’ve got the gear to get the job done right. Don’t trust shortcuts when it comes to paint prep—trust the pros, and trust quality products.
Automotive Paint Shop References:
- Automotive Body Repair: Paint Preparation and Refinishing, ASE (Automotive Service Excellence) Education Foundation, 2021.
- Modern Paint Stripping Techniques for Automotive Applications, Society of Collision Repair Specialists (SCRS), 2022.
- Best Practices for Surface Preparation in Automotive Refinishing, DuPont Performance Coatings Technical Bulletin, 2020.
- Chemical Compatibility in Paint Stripping and Surface Prep, Automotive Industrial Manufacturers Association (AIMA), 2021.
Shenzhen Honglichang Machinery Manufacturing Co., Ltd.
We are one of the most professional automotive paint shop manufacturers and suppliers in China, also support customized service. Please feel free to buy advanced automotive paint shop for sale here from our factory. Welcome to contact us for quotation.
Address: No.A802, Building 2, Tianan Digital Plaza, Longgang, Shenzhen, China
E-mail: victor@honglichang.com
WebSite: https://www.honglichang-paint.com/
